Zoom Language Interpretation Summary:
Tom Doyle / Zoom Online Japanese-English Interpretation
Remote Simultaneous Interpreter
Language interpretation in meetings and webinars
Overview
Users that would like to include interpreters in their meetings or webinars now have the ability to enable language interpretation. This allows the host to designate participants as interpreters on the web portal or during a Zoom session. Language interpreters do not need a Zoom account.
When the meeting or webinar starts, the host can start the interpretation feature, which will give the interpreters access to their own audio channels. Attendees can select an audio channel to hear their language of choice. Attendees will hear the translated audio and can choose if they want to hear the original audio at a lower volume.
Cloud recordings of interpretation sessions will only record the original audio of the meeting or webinar, not the translations. Local recordings of interpretation sessions will record any audio that the person recording can hear, but not multiple audio channels.
Note: Language interpretation cannot be used with Personal Meeting ID (PMI). To enable language interpretation, choose the option Generate Automatically for the Meeting ID.
This article covers:
- Language interpretation setup
- Starting language interpretation in a meeting
- Listening to language interpretation
Prerequisites
- Business, Education, or Enterprise Account; or Webinar add-on plan
- Zoom Desktop Client
- Windows: 4.5.3261.0825 or higher
- macOS: 4.5.3261.0825 or higher
- Zoom Mobile App
- Android: 4.5.3261.0825 or higher
- iOS: 4.5.0 (3261.0825) or higher
- Meeting with an automatically generated meeting ID
Note: Contact Zoom Support to have this feature enabled.
Instructions
Language interpretation setup
- Sign in to the Zoom web portal and click Settings.
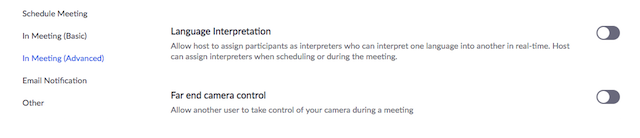
- Enable Language Interpretation under the In Meeting (Advanced) heading.
- Navigate to Meetings and click Schedule a New Meeting.
- Click Generate Automatically next to Meeting ID. This setting is required for language interpretation.
- Check the box to Enable Language Interpretation for the meeting.
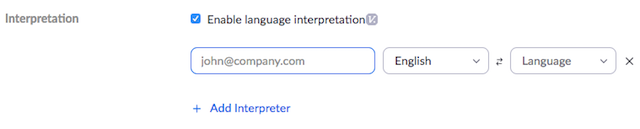
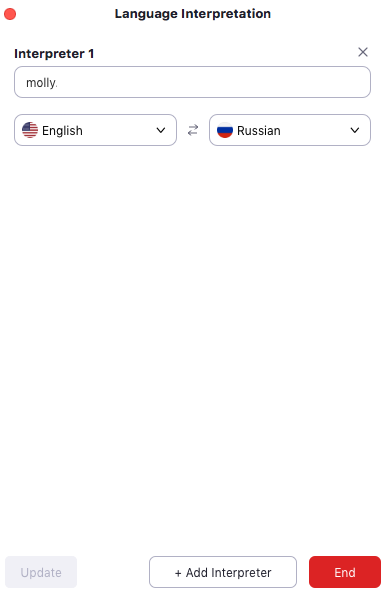
- Input the information for your interpreter. The languages you select for an interpreter will create audio channels for those languages in your meeting. All of these channels do not have to be used in the meeting.
- Click Add Interpreter if you need to include more. Click the X icon to remove an interpreter.
- Click Save when you are finished.
Note: This process is similar to enabling language interpretation for webinars. Navigate to Webinars and click Schedule a Webinar, then follow steps 4-7.
Starting language interpretation in a meeting
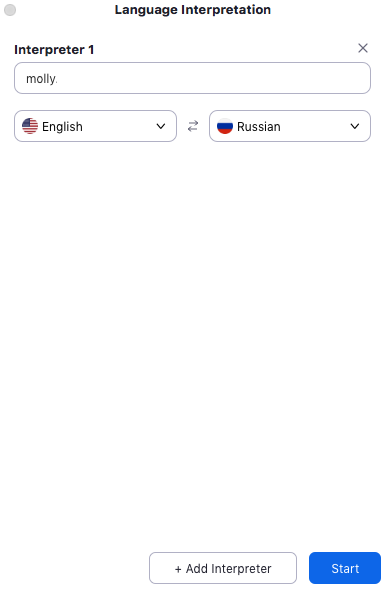
- Once your meeting has started, click Interpretation.

- You can add or remove Interpreters from this menu, if necessary. Click Start to begin the interpretation sessions.
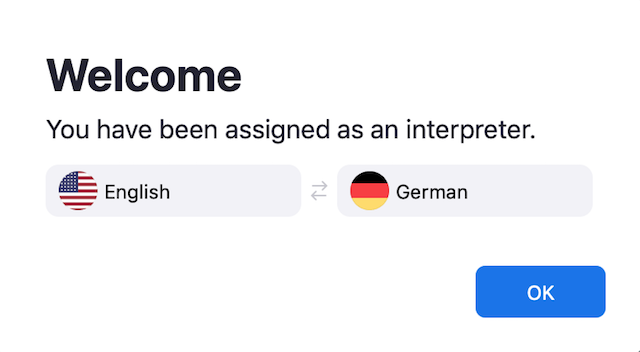
- After the host clicks Start, the interpreters will receive a message that they have been assigned.
- Interpreters and attendees will now be able to click Interpretation in the meeting options and select a language channel.

- An interpreter in the channel will hear the original meeting audio which they can translate. Participants in a language channel will hear the translated audio and also the original audio at a lower volume.
- To end the interpretation session(s), the host will need to click Interpretation in the meeting options, then click Manage Language Interpretation.

- Once the menu appears, the host can click End to stop the sessions.
- The host can also click Manage Language Interpretation to make changes to the interpreter settings during a session.
Listening to language interpretation

 macOS
macOS- In your meeting/webinar controls, click Interpretation.
- Click the language that you would like to hear.
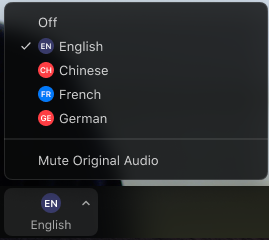
- (Optional) To only hear the interpreted language, click Mute Original Audio.
Recent Comments